Product Information Manager : Documents
Access
To get access to the Documents tab, you can use the following options:
- On the Product Search page:
- Click
 to open the Product Editor on the Master Data tab, then click the
Documents tab.
to open the Product Editor on the Master Data tab, then click the
Documents tab.
- Click the
 icon (next to
) to open the
Documents tab directly.
icon (next to
) to open the
Documents tab directly.
- Click
- On the Product Preview page:
- Click the
icon (next to
) and select the
Documents option.
- Click the
Contents
Overview
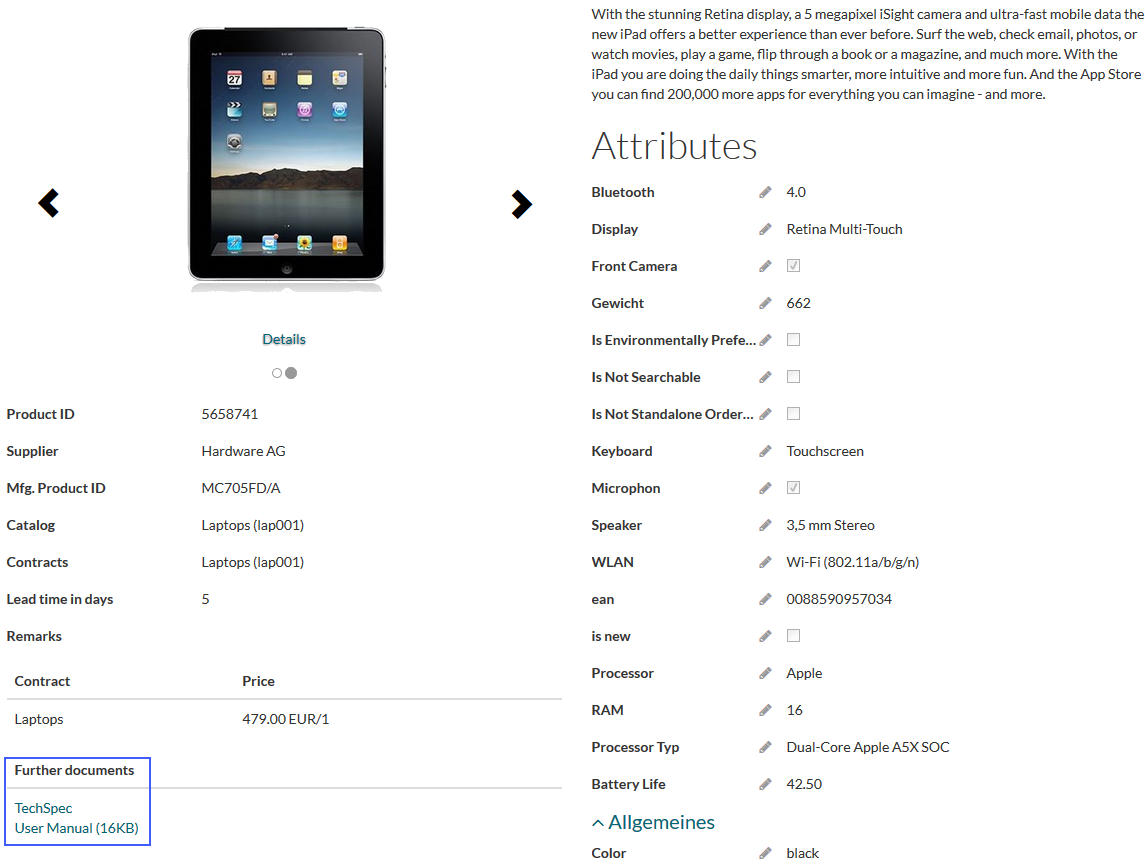
The Documents functionality enables users to add/edit/delete documents such as product images, technical and textual documents etc., uploaded in the Digital Asset Manager - DAM space.
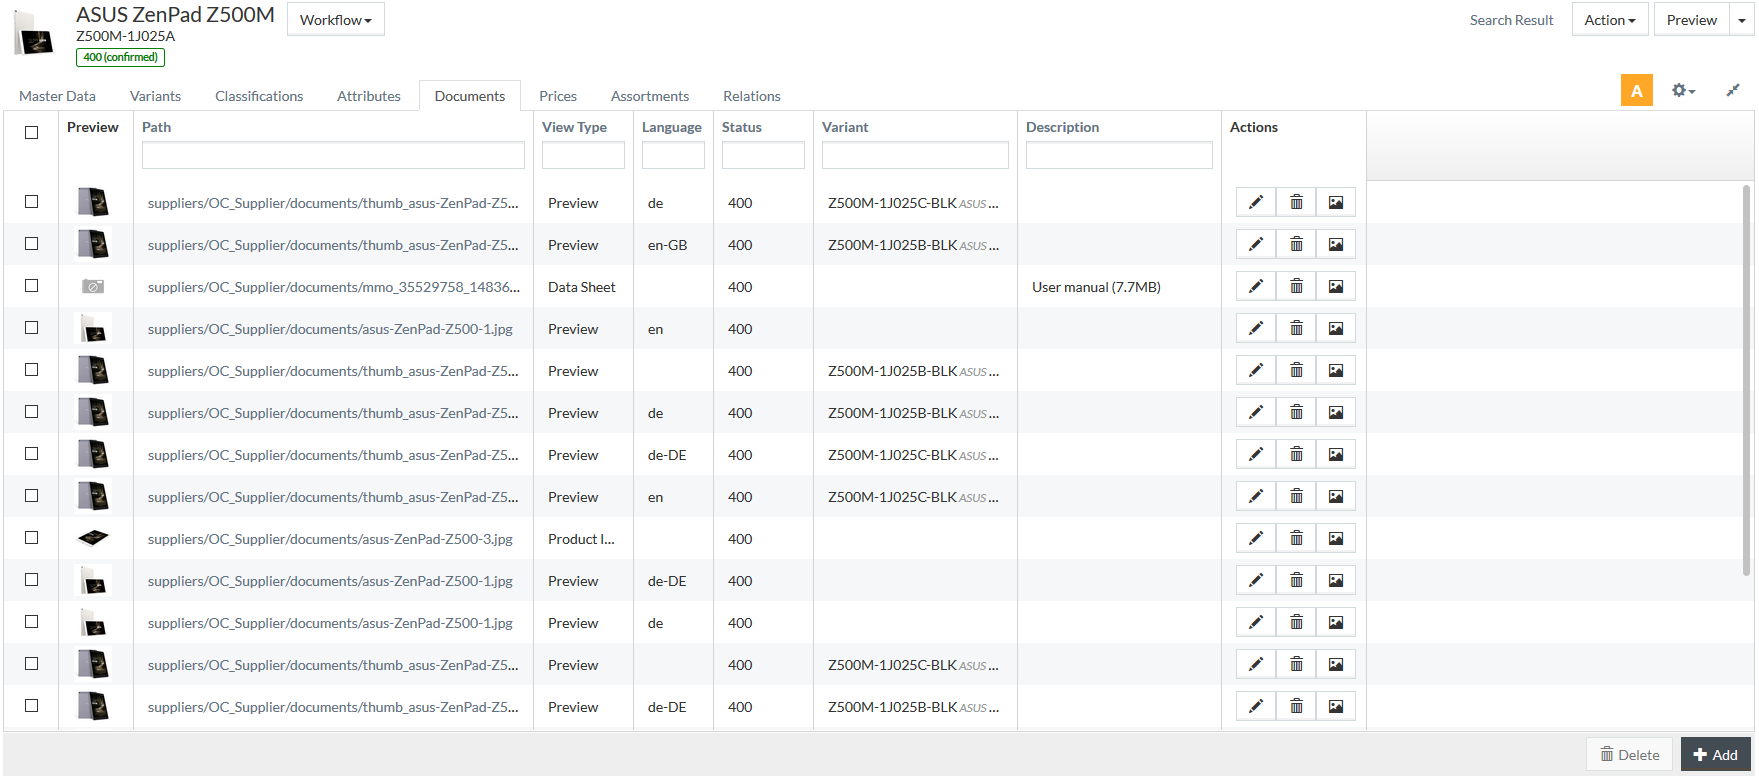
Click the thumbnail image in Preview column to view it in full size.
Click the link in the
Path column or
 in
Actions column to open the
Document Details page in DAM (if DAM is installed) or to view the document in a new browser tab.
in
Actions column to open the
Document Details page in DAM (if DAM is installed) or to view the document in a new browser tab.
See the Common Toolbar section of the Product Editor page for more info on the generic actions.
Add Document
To add a document to a product, click
 at the
bottom of the grid.
at the
bottom of the grid.
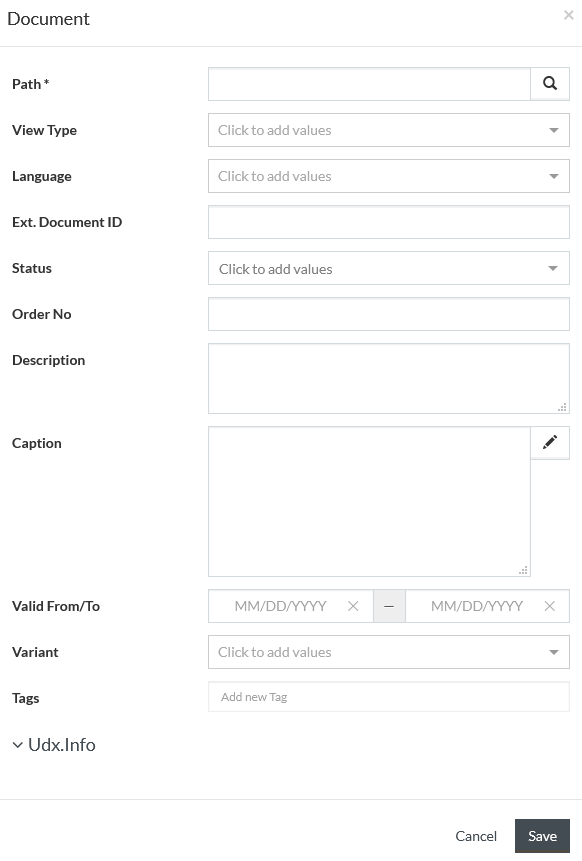
Enter a
Path to the document or click the
 icon to search for the required document in the
DAM space.
icon to search for the required document in the
DAM space.
| If you want to add a document file, the respective file should be uploaded to the supplier's Documents folder in the Work Area. |
|
In addition to documents from DAM, you can include links to external resources as a part of product information. Type a path to the resource and select the View type ( Data Sheet, Detail View or Others). The added link is displayed in Further Documents section on the Preview page. |
|
The Path value cannot exceed 255 symbols. |
Choose the View Type from the drop-down list. Depending on the selected Document View Type the Product image can be displayed as follows.
|
All images can be language-specific. For this, select the Language for which the image should be displayed using the drop-down menu . In case no language is specified for the document, the document is used for all languages but those, which are explicitly specified for other documents of this type. |
|
Enter the document Order No. to specify the sequence in which images should be displayed. The image with the lowest order number goes first. |
The image of the Preview type will be displayed:
- on the Product Search page (in case there are multiple documents of Preview type, the image with the lowest Order No. will be displayed (if there are images having the same or no order number, the last one uploaded will be displayed):

- in the header of the Product Editor page (in case there are multiple documents of Preview type, the image with the lowest Order No. will be displayed (if there are images having the same or no order number, the last one uploaded will be displayed):

- in the Carousel element on the Product Preview/Details page:
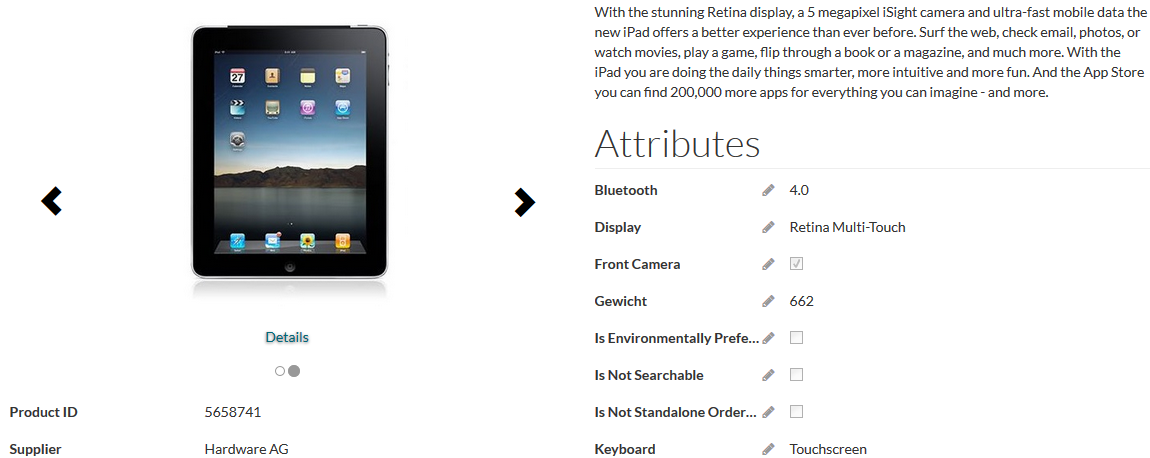
The image of the Product Image type will be displayed as the first product picture in the Carousel element on the Product Preview/Details page.
The documents of the Data Sheet, Detail View and Others view types will be displayed in the Further documents section of the Product Preview/Details page.
If necessary, specify the Description of the document.
Enter the
Caption in the provided field or click
 to
open the
Caption editor, when needed.
Terms can be used for captions.
to
open the
Caption editor, when needed.
Terms can be used for captions.
|
References to products are not supported in document captions. |
Enter dates for the Valid From and To fields or use the date picker.
Select the Variant from the drop-down to assign the document to the selected product variant.
You can use
Tags for the document. Enter any tag or use autocomplete function available when you start entering a tag created
on
Tags page. Several tags can be used for one document. The tags can be assigned only when the document is being added.
Expand
Udx.Info section to enter Udx details, when needed.
After all the details have been added, click
 to save and
validate the newly added document.
to save and
validate the newly added document.
Edit / Delete Document
Select the document to be edited from the grid and click the corresponding
 icon under
the
Actions column of the grid to edit it.
icon under
the
Actions column of the grid to edit it.
The following fields cannot be edited: Path, View Type, Language, Variant, Tags.
In addition to Udx.Info section, Audit Info section appears. Expand the section to track who and when made the last changes to the entry.
Click
 icon to
delete a product document.
icon to
delete a product document.
Check the appropriate check boxes and click
 to delete
chosen entries.
to delete
chosen entries.